Panorama Automation
Automating surround and stereo positions works the same way as for all other effect parameters on the track: Select one of the automation modes Touch, Latch, or Overwrite, start playback, and move the position of the source as desired in the Spatial Panner. As with the other effect dialogs, the position can also be automated in Read automation mode if you hold down the Ctrl and Alt keys while moving. For detailed information, see the Automation chapter.
In addition to real-time automation, you can also "draw in" the automation. This works both in the Spatial Panner for the track and for objects.
Drawing Automation

You can also draw the movement in the Spatial Panner. To do this, first define a playback range over whose length the drawn movement sequence will be traversed. Only then can drawing mode be activated using the Draw button.
When spatial panning an object, this time range always corresponds to the object length. If the automation should occur over a shorter section, split the object.
Now activate Draw and draw the movement sequence in one continuous motion by clicking in the Spatial Panner and dragging the sound source. Releasing the mouse button ends the drawing process, and an according automation curves are created.
In the Spatial Panner options, you can disable the Keep draw mode active option so that the Draw mode will be disabled after each drawing operation.
The Linear and Timing options determine the timing: In Linear mode, the movement sequence is distributed evenly over the entire range; it doesn't matter how fast or slow you draw. If Timing is selected, the speed at which you draw matters. Even if you pause while drawing, this pause is taken into account. The mouse button must remain held down throughout. After releasing the mouse button, the movement sequence is fitted into the time span of the playback range, while the speed used while drawing is preserved.
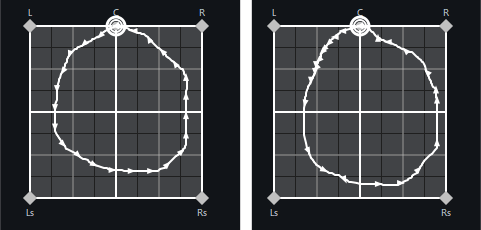
With linear timing (left), the curve is traversed at a constant speed; in Timing mode (right), the density of the arrows shows where drawing was slower or faster.
Pressing the Shift key temporarily toggles between Linear and Timing mode.
Pan Linking and Automation
Since the pan position can be linked for all target routings or set separately, and can therefore also be automated separately, a rule is needed for how these automations are handled when linking is disabled or enabled.
|
|
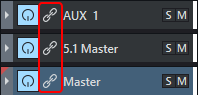
All linked targets use a shared pan position. In other words, if you change the pan position of a source in one of the targets, it is simultaneously changed in the other targets as well, since it is the same position in all targets. For this reason, the surround display is also shown in the stereo targets in this case. |

With linked stereo targets (left), the 3D representation of the panorama is still shown if surround targets are also present. Without linking, the stereo editor is displayed (right).
If this position is automated, all linked target routings use this automation data. If linking is disabled for a target, that target has an independent position, and the automation data is copied into new automation curves. In the case of a stereo target, only the x-y coordinate is used.
Example: You have a pan automation and an AUX1 send bus. If you unlink AUX 1 as a target, a Pan (AUX 1) automation curve is created, which is initially a copy of the Pan automation curve but can now be edited independently.
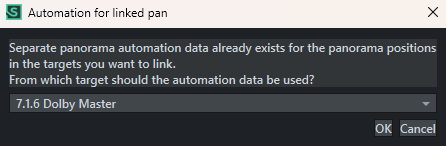
You can now automate the positions in the two targets independently of each other. If you relink the targets later, you can choose which of the two curves should be used for the shared automation.