Video tutorial
Adding Stock Content (Storyblocks)
Find ready-to-use stock media from the Storyblocks library and add it to your projects directly in Vegas Pro. Use it when you want to add licensed video clips or audio to a project without switching to an external service. This is especially useful when you need to fill gaps in an edit, build an intro, or add background music.
NOTE This feature is available only with a Vegas Pro subscription.
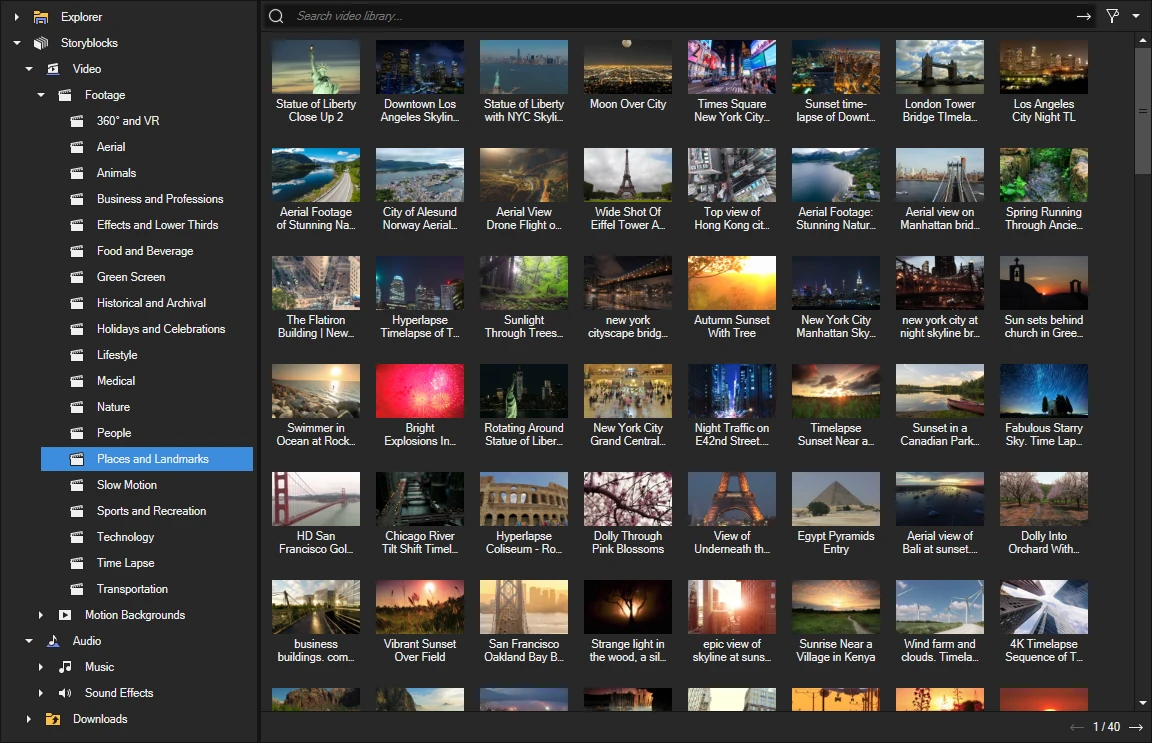
FIGURE Storyblocks in the Explorer window
The EULA that you accepted when you installed Vegas Pro defines how you can use stock media from Storyblocks. Check the EULA if a copyright or licensing question occurs.
Find and preview stock content
- Choose View | Window | Explorer, or press Alt+1, to open the Explorer window.
-
Expand Storyblocks and click Video or Audio.
Results appear right away, before you enter a search term.
- Enter a search term in the search box, and then press Enter or click the arrow next to the box.
-
Review the results.
A page shows up to 250 results. To go to the next or previous page, click the arrows next to the page number at the bottom right.
-
Start the preview in one of these ways:
- Point to a thumbnail and click the play button.
- Point to a thumbnail, click the more button (…), and choose Start Preview.
- Right-click a thumbnail and choose Start Preview.
Vegas Pro first downloads a short preview file, so the preview can take a moment to start.
- Watch or listen to the preview. Video previews play in the Video Preview window.
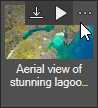
FIGURE Thumbnail actions
Browse categories
Browse categories when you want ideas for an edit and don't have a search term yet.
- In the Explorer window, expand Storyblocks.
- Expand Video or Audio.
- Expand a content type: Footage or Motion Backgrounds under Video, Music or Sound Effects under Audio.
- Click a category.
The results show content from the selected category. A search in a category returns results from that category only. Storyblocks provides the list of categories.
Filter video results
Filter video results by usage rights and resolution to find clips that fit your project. Filters are available for video only.
- Click Video or one of its categories.
- Click the filter button (funnel icon) to the right of the search box.
- Select the options that you want.
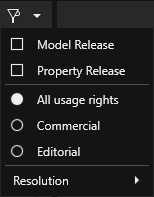
FIGURE Filter menu
The results update when you close the filter menu.
|
Option |
Description |
|---|---|
|
Model Release |
Shows only clips with a model release, a signed consent from the people shown in the clip. |
|
Property Release |
Shows only clips with a property release for the location or property shown. |
|
All usage rights, Commercial, Editorial |
All usage rights shows all clips (default). Commercial hides clips for editorial use only. Editorial shows only clips for editorial use. |
|
Resolution |
Choose All (default), HD, 4K, or 8K to show clips in that resolution. There's no Full HD option because every Storyblocks clip is available in Full HD. |
Download stock content
-
Open the download list in one of these ways:
- Point to a thumbnail and click the download button.
- Point to a thumbnail, click the more button (…), and choose Download.
- Right-click a thumbnail and choose Download.
-
Choose a file from the submenu.
Each video entry shows the file format, the resolution, and the file size. Audio entries show the file format and the file size. The download starts right away.
-
Wait until the download is complete.
The progress appears at the bottom of the window. Click it to show each download and to cancel a running download. To cancel all downloads, click the button at the far right.

FIGURE Download progress
Add downloaded files to your project
You can't drag search results to the timeline. Download a file first, and then add it from the Downloads folder.
- In the Explorer window, expand Storyblocks, and then expand Downloads.
-
Click Video or Audio to open your downloaded files.
NOTE If a new download doesn't appear, point to Video or Audio, click the more button (…), and choose Refresh.
-
Add the file to your project in one of these ways:
- Point to the thumbnail and click the + button to add the file to the timeline.
- Click the more button (…) and choose Add to Timeline or Add to Project Media.
- Drag the file to the timeline.
TIP Downloaded files are saved in the Documents\Vegas\Vegas Content folder. To use a different folder, right-click Downloads, choose Change Directory..., and select the new folder. You can change the folder at any time. If you've already downloaded files, Vegas Pro asks whether to move them to the new folder.
Last modified on October 19, 2026
Was this page helpful?
What did you particularly like about this page?
What did you dislike about this page?
Thank you for your feedback.