Editing Track Indices and Metadata
Use the Track Indices (also called Track Markers) to divide a project into individual tracks for
They can be edited in detail in the
Setting Individual Track Indices
Place the play cursor at the desired position and set track indices using the commands in the menu CD > Indices or these buttons. The numbering of already set, subsequent indices is automatically adjusted.

To display the track index buttons, select the workspace Mastering.
|
|
Set CD Track Index |
Track indices split a project into individual sections that correspond to individual Shortcut: Ctrl + Alt + I |
|
|
Set CD Sub Index |
Sub indices are used to mark individual sections within a track and can be accessed by some CD players. |
|
|
Set CD Pause Index |
The CD pause index is a special sub index (index 0) used to mark the end of a CD track. At this point, some CD players switch to absolute silence during playback until the next track index, and the time in the display runs as a countdown to the start of the next track. |
|
|
Set CD End Index |
This index marks the end of the CD. You can also use the end index to specify the end of an export to keep additional audio material behind it, such as unused recordings and other material in the project that should not included in the export. You can also specify the starting point for |
|
|
Set Track indices at object edges |
This function inserts track indices at each object in the project. In the submenu Set indices at object edges - Options some additional options for this function can be set by selecting the corresponding menu item:
If the audio files of the objects contain metadata like artist, title, album… (ID3 tags of MP3 files) |


Use the menu option Remove Index to delete an index from the project. To select it, place the play cursor on the index position. Remove all indexes (keyboard shortcut:Ctrl + Alt + Shift + I) removes all indexes.
The menu option Set track indices after silence… opens a special version of the dialog Set markers after silence, which lets you set CD track indices automatically based on detected pauses in the audio material.
Managing Metadata via Track Indices
CD Track Indices were originally intended only for dividing a project into individual titles before burning onto a CD. With the ability to burn CD text, the indices gained the additional ability to store the title of a CD track and other metadata (ID3 tags). Even though direct CD burning is no longer supported, Sequoia still needs the CD title indexes to store such metadata if the project is to be exported into several individual MP3 files that should contain the corresponding metadata for the individual tracks..
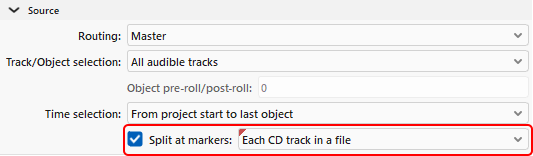
Use the function Set indexes at object edges to transfer already existing metadata from the objects' audio files to CD track indexes. Afterwards, this data can be edited via the CD-Text/ID3-Editor. To export the project to individual files and, in the process, enter the CD track index data in the metadata (ID3 tags) of the exported files, select the option Each CD track to a file in the Export dialog at Split at markers.