Using Sound Forge Pro with the Windows Explorer Context Menu

For minor routine tasks, such as converting to other file formats, normalizing, or removing silence at the beginning and end of a recording, there is no need to open Sound Forge Pro.
Normally, for example, to convert you would first have to launch the program, browse for the corresponding audio file in the Explorer window and open it, make your edits, then click Save As..., set the desired format and click Save. And then the new file is still in the default save folder and not just next to the source file, so you might have to move it around. This is much faster from the Windows Explorer context menu! Simply right-click on the audio file and select the desired action from the context menu.
TIP It is possible to select multiple files and right click them and perform the desired action to all selected files.
The processing takes place in the background, without the program window being opened or any output taking place. If user input is required, it is requested in a small dialog box. The edited file will be saved in the same folder as the source file under the same name, at the end of the name an abbreviation corresponding to the chosen action will be added, in case of conversion to another file format with the new file extension, e.g. file.wav will become file.wav.mp3.
You can also find the actions from the context menu in the program itself, in the Instant Actions in the areas Edit and Export.
|
|
Convert |
Use this context menu item to convert audio files to other file formats. After selecting this option, a prompt for the desired file format and the corresponding template appears. For more information on file format templates, visit Save As/Render As |
|
|
Normalize |
Use this option to normalize the audio file, i.e. increase the level to a maximum value. To do this, select a preset from the following menu. Besides a pure level increase to 0dB or -0.3dB, there are also templates for RMS normalization and for loudness normalization according to loudness standards. The level is raised to a target value for the average loudness. If the file has large level differences, the peak levels can exceed 0dB, then a limiter is used. The result file gets the original file name and "_N" is appended. |
|
|
Trim silence from Start and end |
This option removes silence at the beginning and end of the file. The result file gets the original file name and "_T" is appended. |
|
|
Fade in/out |
Use this option to fade in and fade out the file. A query is made for the length of the fades. The result file gets the original file name and "_F" is appended. |
|
|
Split into equidistant parts |
The audio file is divided into a number of equal-sized parts. It asks for the number. The resulting files will have the original file name, with "_Part "+<Part number> added. |
|
|
Clean region names for export |
For an export of the regions into individual files (see below), the region names are used as file names. This function ensures that the names do not contain any characters that are forbidden for file names (e.g. : or ?). |
|
|
Export region list |
A list of the regions contained in the file is exported as a text file. |
|
|
Export Regions as files |
The regions marked in the audio file are exported as individual files. The result files receive the original file name, supplemented by the number and the name of the region. |
|
|
Generate statistics |
The function Statistics is executed and the results are saved in a text file. |


IMPORTANT The context menu entries are only available if you activated the corresponding option when installing Sound Forge Pro. 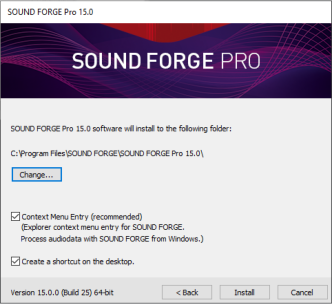
If this was not the case, you must uninstall the program and reinstall it with the option enabled to create the context menu entries.
Last modified on February 23, 2026
Was this page helpful?
What did you particularly like about this page?
What did you dislike about this page?
Thank you for your feedback.