Take Manager
The take manager offers you a convenient option for selecting and organizing recording takes, loop recordings, and offline object edits.
|
Menu:
|
View > Manager > Take Manager
|
|
Keyboard Shortcut:
|
Ctrl + Shift + Alt + T
|

When graphically comping with the Take Lanes, you cut together the perfect take from different take sections.
Note: Also after offline effect calculations, a new take is created and displayed in the Take Manager. To do this, the option Create copy must be active in the offline effect dialog.
Sequoia stores in each recorded file not only audio and MIDI data, but also additional information about at which time position and in which track in the arranger the file was recorded (original position). This data is stored in the audio file and in the MIDI object as take information. When working with multitrack recordings the takes also contain information like, for example, which other tracks were involved in the recording. This allows all recorded material to be assigned to a time period and thus identified as a take of a particular recording.
So you can record multiple takes on the same tracks at the same time position on top of each other. The existing data is not overwritten, but, depending on the Recording options, the new recordings are appended to the recording file or are saved in a new file.
Now, when you select an object and open the Take Manager, all the audio in the project is searched for takes from the same track and with the same original position, and the matches are displayed as takes.
Note: The Take Manager lists only objects created by recording and not objects created by importing audio files.
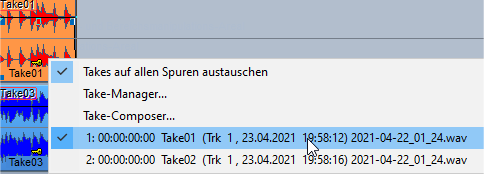
In the Take Manager, takes matching the selected object are displayed in a list. With default settings, this refers to all the takes from the same track and original position. The current object take can be identified by the checkmark preceding the name in the take list.
To select a take for the object, place a check mark before the desired take, or press Enter after you have selected the corresponding take in the take manager.
Select a take directly in the arranger window by applying Ctrl + right click to the object.
Rename take: Using the context menu of the take, you can rename it and edit the recording position. Multiple selection is also possible here.
Edit recording position: This option enables you to make changes in the position field of the take manager.
Delete Take: You can use the context menu of the take to delete it in the Take Manager. Multiple selection is also possible here. When you have deleted all takes except the last one, you can decide by query whether you want to delete also the referenced file in addition to the last take. However, make sure that the audio file you are about to delete is not used in other projects.
Note: If the audio file is no longer referenced by objects but contains multiple takes, you don't have to delete each take first to remove the file from disk entirely. Instead, use the Remove Unused Samples function from the File > Clean up & Backup menu.
Note: For a better overview, convenient take naming options are already available during recording in the recording window.
The options can be used to filter the take list.

Filter record position: Only those takes are displayed that have the same original time position as the selected object. This option should be disabled only in exceptional cases.
Filter too short takes: Only takes that are at least as long as the currently selected take are shown. This allows you to filter out recording takes that were canceled earlier due to errors.
Show all multi-track takes: Takes of all tracks will be shown. This option should only be activated in exceptional cases, e.g. to find "lost" takes.
In multitrack recordings, each recording creates takes on each recording track that are classified as belonging together. Simultaneously recorded objects are grouped and also given the same take name.
Replace takes on all tracks: If this option is enabled, you replace all takes of a multitrack recording in one go when you replace the take in one object of a track.
Note: Since the "Take Manager" display always refers to the last object clicked, you can change the reference track by selecting an object on another track.