Detecting and Marking Clipping
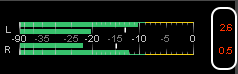
The clip indicator in the channel meters helps you determine if clipping occurs in the file. You can use the command Search to find audio data that reaches the specified levels. For more control, however, you can use the detect clipping tool.
From the Tools menu, choose Detect Clipping to scan a selection of audio for clipping and add markers where clipping occurs.
Markers can be quickly selected from the list in the Go To dialog. Also, markers are displayed in the Regions List for quick playback.
-
Select the audio material to be searched.
-
From the Tools menu, choose Detect Clipping. The Detect Clipping dialog is displayed.
-
Choose a setting from the Preset drop-down list or adjust the controls as necessary.
-
Drag the Threshold fader to determine the sound level you want to find.
-
Set a value in the Clip Length box to specify how many sequential samples must meet the Threshold setting to constitute clipping.
-
Activate the Use True Peaks checkbox if you want to detect clipping using the True Peaks in dB FS from the loudness meter.
TIP Please note that true peaks are calculated using a higher sample rate than peaks in the Channel Meters for increased accuracy.
-
-
When the Use True Peaks check box is selected, select the Enable DC Blocking Filter check box if you want to filter the true peak sample value to compensate for asymmetrical audio signals or DC offset. Filtered true peaks are calculated as the maximum of the filtered and unfiltered signals.
-
Click the OK button
The selection is scanned, and markers are added whenever the software finds a number of sequential samples (determined by the Clip Length setting) with the same value above the Threshold setting.
TIP Use the Detect all clip-related plateaus preset to detect clipped peaks that may exist in your file after decreasing the levels in the file. You can then use the Pencil tool or the DeClipper plug-in to restore the clipped peaks.
Last modified on February 23, 2026
Was this page helpful?
What did you particularly like about this page?
What did you dislike about this page?
Thank you for your feedback.